At Skin City Tattoo & Body Piercing, our talented artists and professional piercers are known for creating high-quality, custom body art in a clean and welcoming environment. Each artist brings a unique specialty - from black & grey realism, fine-line tattooing, and geometric work to bold color tattoos, traditional pieces, and precision body piercings. We’re proud to serve Tigard and the greater Portland, Oregon area, offering a full range of tattoo and piercing services designed to make every client feel confident and informed.

Understanding Bookings and Gift Cards at Skin City Ink
Each of our artists manages their own bookings, possessing different availabilities and working in distinct styles. If you are uncertain which artist to book with, or how to get in touch with a specific artist, you can contact the shop, and we will gladly direct you. Artist availability varies depending on the artist and their personal schedules. Most artists book appointments around one to two months in advance, so it's advisable to keep this in mind when planning your tattoo.
It can take an artist a few days to a few weeks to respond to inquiries, depending on the volume of requests they are managing at any given time. This response time is a reflection of their dedication to each client's individual needs and the intricate nature of custom tattoo design.
Gift Card Policy
Not all of our artists offer gift cards. It is essential to know prior to purchasing a gift card which artist you will be purchasing it from. This is due to the fact that some artists currently have waitlists and cannot guarantee that they would be able to accommodate the particular piece the individual receiving the gift card would want. The artist would first have to consult with the individual about the design and approve it before the recipient can be added to a waitlist or book an appointment. Therefore, some artists are not offering gift cards to avoid accepting projects that they cannot accommodate at this time.
Your Ultimate Guide to Tattoo Aftercare, Styles, and Studio Hygiene
This blog is your go-to resource for trusted tattoo aftercare, style guides, artist selection tips, and studio hygiene practices. You will learn clear step-by-step aftercare for the first 24 hours and the weeks that follow, practical maintenance strategies to preserve color and line work, a style breakdown to match aesthetics with placement and healing needs, and concrete hygiene indicators to look for when choosing a studio. Many people worry about infection risk, fading, or picking the wrong artist for a style; this guide addresses those concerns with actionable steps and decision frameworks.
The article maps out essential aftercare routines, a comparison of popular tattoo styles, how to vet and prepare for consultations with artists, studio sterilization processes, and ways to find custom design inspiration.
Essential Tattoo Aftercare Tips for a Perfect Healing Process
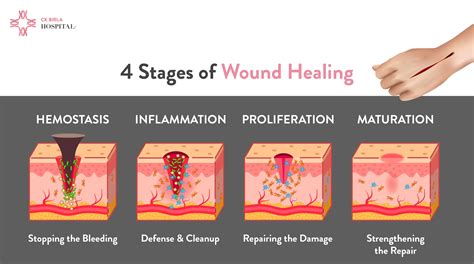
Tattoo aftercare begins immediately, as proper early actions directly reduce infection risk, preserve pigment, and improve the healed appearance. Cleaning, protective bandaging, and measured moisturization form a mechanistic approach: remove the initial dressing at the recommended time, gently cleanse to remove plasma and ink residue, and apply an appropriate aftercare balm to maintain hydration and barrier integrity. These steps reduce bacterial load on the surface while supporting epidermal repair, which results in better color retention and crisper healed lines. Understanding the phases of healing-from initial inflammation to epidermal reformation-helps you tailor daily care and spot deviations that suggest complications.
Follow these stepwise essentials to guide the first days and weeks of healing:
- Remove the initial bandage when your artist indicates, usually within a few hours, and wash hands thoroughly first.
- Clean the tattoo gently with lukewarm water and a mild, fragrance-free cleanser, pat dry, and allow to air for minutes before reapplying a light covering.
- Apply a thin layer of fragrance-free aftercare balm or lotion two to three times daily to prevent excessive scabbing and cracking.
- Avoid soaking the tattoo in baths or pools and keep direct sun exposure to a minimum until fully healed.
- Monitor for signs of infection and contact a healthcare provider if you notice increasing pain, spreading redness, or pus.
These steps create a baseline regimen; the precise first-24-hour actions set the stage for successful long-term healing.
Caring for Your Tattoo in the First 24 Hours
The first 24 hours lay the foundation for all subsequent healing because immediate cleansing and protective actions control contamination and fluid build-up. Start by following your artist's bandaging timeline: most fresh tattoos are wrapped for a short period to control bleeding and reduce friction. Removing that wrap at the recommended time allows gentle cleaning to begin the healing cascade. Wash the area with lukewarm water and a mild, unscented soap using gentle, patting motions-this removes dried plasma and excess ink without disrupting the forming epidermal layer. After cleaning, dry with a clean paper towel by patting, then apply a thin layer of recommended balm and wear loose clothing over the site to prevent rubbing.
This initial routine reduces the risk of trapped moisture and bacterial growth while preparing the tattoo for the scabbing phase. Pay attention to your body's signals during this period, as abnormal swelling or severe pain can indicate an adverse reaction.
Long-Term Tattoo Maintenance Practices
Long-term maintenance focuses on preserving pigment, preventing premature fading, and maintaining skin health through sun protection, moisturization, and occasional touch-ups. Daily moisturization with a fragrance-free lotion keeps the skin supple, reducing ink migration and textural changes that make lines appear blurry over time. Sunscreen is critical once the tattoo is fully healed; UV exposure chemically degrades pigments and accelerates fading, so use broad-spectrum SPF on exposed tattoos to protect saturation. Schedule touch-ups when necessary-smaller touch-up sessions can restore crispness without altering the original composition-and adopt gentle exfoliation habits only once healing is complete to avoid abrading ink.
These maintenance habits ensure a tattoo ages gracefully and reduce the need for extensive corrective work later.
Recognizing and Preventing Tattoo Infections
Recognizing infection early depends on knowing normal healing signs versus warning signals: mild redness, clear fluid, and light scabbing are typical, while spreading redness, increasing warmth, throbbing pain, yellow or green pus, and fever suggest infection. Prevent infection by following sterile aftercare steps-hand hygiene before touching the tattoo, avoiding contaminated water, and using appropriate products that do not trap bacteria. If infection signs appear, promptly clean the area, discontinue irritative products, and consult a healthcare professional; severe or systemic symptoms require urgent medical attention. Preventive behavior, such as avoiding heavy exercise that causes excessive sweating over a fresh tattoo, reduces friction and bacterial exposure.
Proactive monitoring reduces escalation and supports predictable healing outcomes.
Recommended Aftercare Products
When choosing aftercare products, prioritize fragrance-free, non-comedogenic balms and lotions that support barrier repair without irritating the new tattoo. Products with simple ingredient lists-petrolatum-free emollients or clinically designed balms-help maintain moisture without clogging pores or trapping bacteria; avoid lanolin or heavy fragrances if you have known sensitivities. Gentle cleansers, lightweight moisturizers, and protective balms form a practical regimen. Use small amounts to avoid suffocating the skin and switch to a hydrating lotion after the initial scabbing phase to support long-term skin health.
This selection strategy balances moisture and breathability, which reduces scabbing thickness and improves healed texture.
| Aftercare Step | When to Do It | Why it Matters / Product Example |
|---|---|---|
| Initial bandage removal and cleaning | Within hours as artist specifies | Removes plasma and reduces bacterial load; use mild unscented cleanser |
| Moisturize lightly | 2-3 times daily after cleaning | Maintains skin barrier and reduces heavy scab formation; fragrance-free balm |
| Sun protection | After healed, ongoing | Prevents pigment breakdown and fading; broad-spectrum SPF recommended |
| Avoid soaking | During entire healing phase | Prevents bacterial exposure and pigment loss; no baths/pools until healed |
Popular Tattoo Styles Explained
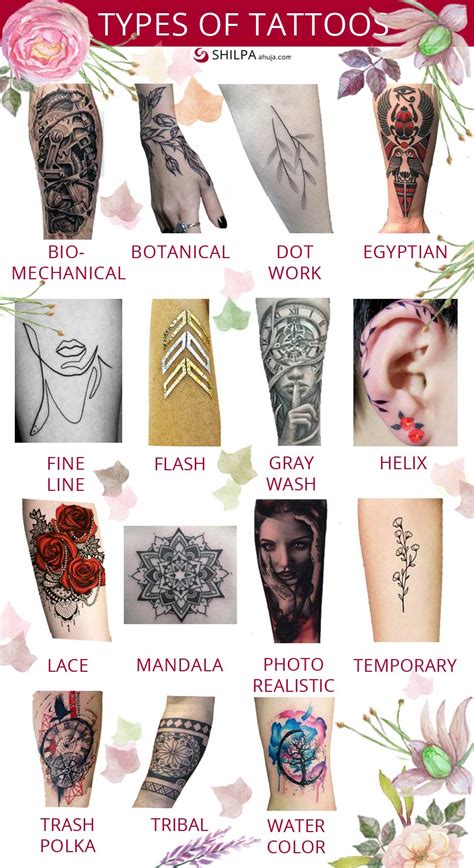
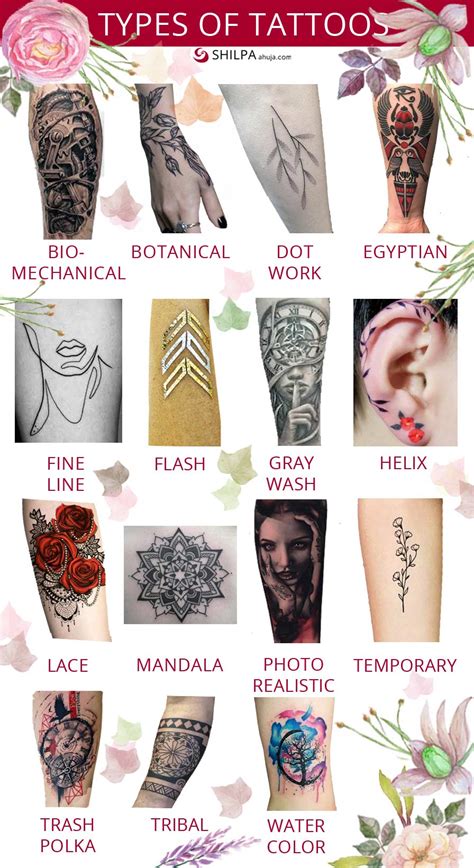
Tattoo styles differ by visual language, technique, and healing characteristics, influencing placement, aftercare, and long-term maintenance. Understanding distinct styles like traditional, neo-traditional, blackwork, realism, and fine line clarifies what to expect visually and technically. Bold lines and saturated color behave differently than delicate fine-line work or shaded realism, which affects scabbing, touch-up frequency, and sun sensitivity. Artists choose needles, ink saturation, and layering techniques based on style, which directly affects healing mechanics and pigment retention. Matching style to lifestyle and placement reduces maintenance and ensures the piece suits the client's long-term aesthetic goals.
Traditional, Neo-Traditional, and Blackwork Tattoos
Traditional tattoos emphasize bold, clean outlines, limited color palettes, and iconic motifs; their thick lines and saturated pigment typically heal robustly and tolerate sunlight better than delicate styles. Neo-traditional builds on those foundations with expanded color ranges, richer shading, and more illustrative details; while visually complex, neo-traditional pieces still lean on solid line work and structured composition. Blackwork relies on large areas of black ink, geometric patterns, or stark silhouettes; these pieces require careful placement because heavy saturation can take longer to settle and may need longer-term touch-ups to address sun-induced fading. Each style's nuances determine aftercare considerations.
Realism and Fine Line Tattoos
Realism seeks photographic detail through nuanced shading, tonal gradients, and layered inks, often requiring multiple sessions and meticulous aftercare to preserve subtle contrasts. Fine-line tattoos focus on delicate, precise lines and minimal shading, which can blur over time if placed on high-friction areas or exposed to frequent sun without protection. Realism typically uses varied needle groupings for blending, while fine-line uses single needles or tight liners to create hairline strokes; these technique differences influence healing time, scab formation, and how quickly a piece may need touch-ups. Placement and size considerations are critical: realism benefits from larger canvases, while fine-line performs best on areas with less stretch and abrasion.
Custom Tattoo Designs
Custom designs begin with a consultation where the artist interprets personal references into a composition that suits anatomy, skin tone, and movement; artists then sketch, refine, and present a stencil for client approval. Collaborative workflows balance client input with artist expertise to ensure designs translate well to the body's contours and heal predictably, drawing on each artist's portfolio strengths. Common requests adapt motifs for placement and size, while artists account for long-term aging and potential touch-up needs during design. This process emphasizes informed decisions that respect both artistic intent and practical outcomes.
Beginner-Friendly Tattoo Styles and Placements
Beginners often do best with styles that use robust line work and moderate shading-traditional, simple neo-traditional, or small blackwork pieces-because they tolerate minor healing variability and everyday wear. Start with mid-sized pieces on lower-friction areas like the upper arm, calf, or shoulder to reduce the chance of early blurring and to make aftercare practical. Pain expectations and aftercare complexity vary by placement and style; simpler designs typically require shorter session times and less intricate touch-ups. Preparing with realistic expectations about healing, sun protection, and future maintenance helps first-timers enjoy the experience and protect their investment.
| Tattoo Style | Visual Characteristics | Best Placement / Healing Considerations |
|---|---|---|
| Traditional | Bold outlines, limited palette | Upper arm, chest; strong healing, low maintenance |
| Neo-Traditional | Rich shading, varied color | Thigh, back; moderate touch-up potential |
| Blackwork | Large black fills, geometric | Forearm, leg; longer saturation settling time |
| Realism | Photographic detail, gradients | Back, chest; larger canvas needed, multi-session |
| Fine Line | Thin lines, minimal shading | Wrist, inner forearm; avoid high-friction zones |
Choosing the Right Tattoo Artist and Ensuring Studio Hygiene
Choosing the right tattoo artist centers on portfolio fit, consistent healed results, hygiene standards, and clear communication during consultation. Evaluate portfolios for style consistency, abundant healed photos (not just fresh work), and examples that demonstrate technical control in the style you want. Artists specialize across various styles, and referencing artist portfolios can clarify who aligns best with your aesthetic and technical needs. A brief checklist of red flags and verification questions helps ensure you select an artist whose past work and processes match your expectations.
What to Look for When Reviewing an Artist’s Portfolio
When reviewing a portfolio, look for consistent line quality across multiple pieces, healed photos that show how color and lines settle over time, and a range of completed projects in the desired style. Ask whether the portfolio images include before/after or healed shots and look for patchy color or blowouts as red flags. Consistency in composition, scale, and successful placement on similar body areas indicates an artist’s reliable judgment. Sample questions to ask an artist during consultation include what aftercare they recommend for your skin type and how they approach touch-ups.
Skin City Ink's Hygiene and Safety Standards
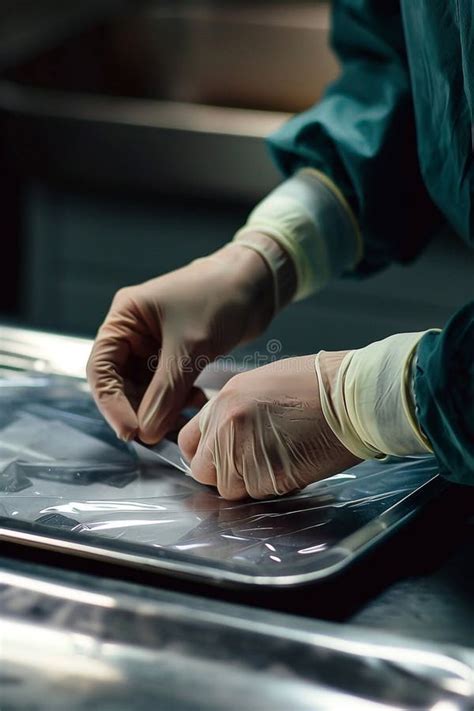
Studio-level hygiene relies on standard sterilization workflows, single-use disposables, and visible cleaning protocols to reduce infection risk and protect clients. Skin City Tattoo & Body Piercing emphasizes cleanliness and sterilization as core practices: expect single-use needles, surface disinfection between clients, and autoclave-sterilized reusable tools when applicable as part of industry best practices. Clients should observe these protocols to ensure a safe and healthy tattooing experience.
Piercing Services and Aftercare at Skin City Ink
Welcome to our FAQ page! Here you’ll find answers to the most common questions about tattoos, piercings, aftercare, and booking at Skin City Tattoos in Tigard. Walk-ins are welcome as long as time is permitted, but appointments are encouraged. We recommend bringing any visual references that help us better understand your ideas! Please refrain from bringing just images on your phone; physical references are more helpful.
We’ll provide you with detailed aftercare instructions. Generally, you’ll want to keep the pierced area clean, moisturized, and avoid picking or scratching. Deposits are non-refundable.
Piercing Pricing and Jewelry Selection
The total investment for a piercing depends on several factors, including the piercing(s) selected, the jewelry chosen, and your anatomy. We are proud to have a large and constantly growing collection of jewelry options. However, as we are a service-based studio, not a retail store, our inventory can vary, making it difficult to accurately quote prices before your appointment. Even basic jewelry selection is anatomy-dependent, which can only be assessed in person by a piercer.
Anatomy-Dependent Piercings
Piercing placement is very anatomy-dependent. Even popular piercings like earlobe piercings may not be a safe option for everyone’s body. During your appointment, your piercer will conduct an anatomy assessment before making the final decision to pierce. Common piercings that are heavily anatomy-dependent include Daith, Rook, Tragus, Industrial, Navel, Nipple, Septum, and Surface/Dermal Piercings.
Cancellation Policy
We have a $40 fee that will be applied to compensate us for the time set aside for clients who choose to not show up for their scheduled appointment start time or need to cancel within 24 hours of their scheduled appointment time. This fee is charged to the card on file.
Minors and Piercings
All parents/guardians must arrive with their child. Minors cannot be left unattended in the shop. We do not use piercing guns; we are licensed professionals who take great pride in working with needles. Our tool selection varies depending on the piercer and procedure you are wanting to book for. All of our artists pierce using single-use sterilized needles. If we need to utilize a tool, we have a multi-step cleaning protocol that follows OHA health and safety standards.
Sterilization and Jewelry Standards
We utilize two machines in our cleaning process: an ultrasonic cleaner to remove microscopic debris, and a steam autoclave to sterilize the tools and render them re-usable. This process does not apply to needles. We use jewelry that meets the standards set by the Association of Professional Piercers for initial piercings and those required by the state of Oregon. We carry implant-grade surgical steel that is ASTM F-138 compliant, implant-grade titanium (Ti6Al4V ELI) that is ASTM F-136 (or ASTM F-67) compliant, Niobium, gold between 14k and 18k, and many biocompatible types of glass.
Jewelry bought online or in common places is usually made of “mystery metals” and is often price-hiked to imply quality. It is important to only put safe materials in your body and to avoid plated, painted, or acrylic jewelry. We do not accept outside jewelry for an initial piercing. We provide only high-grade jewelry that is compatible with the body from well-known, reputable body jewelry companies.
Retainers and Discreet Jewelry Options
If you need to wear jewelry temporarily or a low-key piece, "retainers" are often the solution. They can come in plastic or glass, but plastic should not be worn long-term in any piercing. The body’s natural acidity can cause a breakdown in plastic if kept in too long. Glass is hypoallergenic and biocompatible and won’t interfere with MRI/CAT scans or surgery. For discreet options, some brands offer press-fit ends in shades of brown and pink tones to emulate the illusion of a mole or a freckle. Septum piercings can easily be flipped up into the nostril by wearing circular barbells or U-shaped retainers. Anodizing metal can also help downplay visibility by oxidizing the outer layer of the piece in different colors. Titanium and Niobium are metals that can be colored through anodizing, a controlled oxidation process.