Welcome to a collection of tutorials for creating charming and functional makeup bags, inspired by the beloved characters of Lilo & Stitch. These projects are perfect for beginners with a little sewing experience and can be completed in under an hour once you're comfortable. They are also an excellent way to use up fabric scraps and make wonderful gifts.

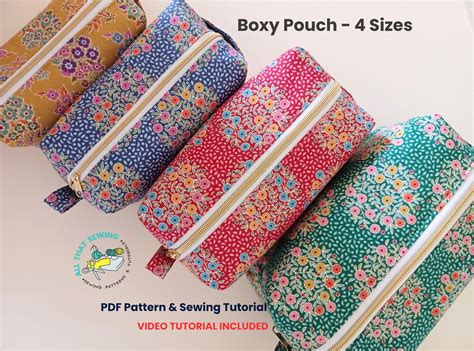
Boxy Cosmetic Bag Tutorial
This tutorial focuses on creating a boxy cosmetic bag, designed to keep all your beauty essentials organized and in one place. These bags are not only super functional but also look incredibly cute sitting on your counter.
Why a Boxy Cosmetic Bag?
Do you ever find yourself sifting through drawers searching for items needed to get ready? This little bag helps keep everything accessible. Beyond cosmetics, they are versatile for storing medications, toiletries, and other small items. You can even make a matching set in different sizes!
Materials Needed:
- Pattern template (print at 100% scale to fit an A4 paper)
- 2 main fabric pieces (approx. 45 x 60cm / 18 x 24″)
- 2 lining fabric pieces (waterproof if making a wash bag, approx. 45 x 60cm / 18 x 24″)
- 1 regular zipper (30.5cm / 12″)
- Medium-weight fusible interfacing
Step-by-Step Instructions:
- Prepare Your Fabric: Start by washing, drying, and ironing your main and lining fabrics. This preshrinks the material to prevent stitches from pulling out later. Do not wash the interfacing.
- Cut Your Fabric: Decide on the size of your bag.
- For a 9-inch zipper small bag, cut fabric pieces 10x14 inches.
- For a 12-inch zipper larger bag, cut fabric pieces 13x18 inches.
- Apply Interfacing: Press the fusible interfacing to the wrong side of all your main fabric pieces.
- Attach the Zipper:
- Place one main fabric piece right side down.
- Place another main fabric piece on top, right side up.
- Position the zipper at the top, right side up, with the zipper pull to the right.
- Stitch along the top edge near the zipper.
- Flip the fabric over and align the zipper face down with the top edge. Stitch along the zipper with a zipper foot.
- With the zipper half open, stitch along each side on the wrong side to secure it.
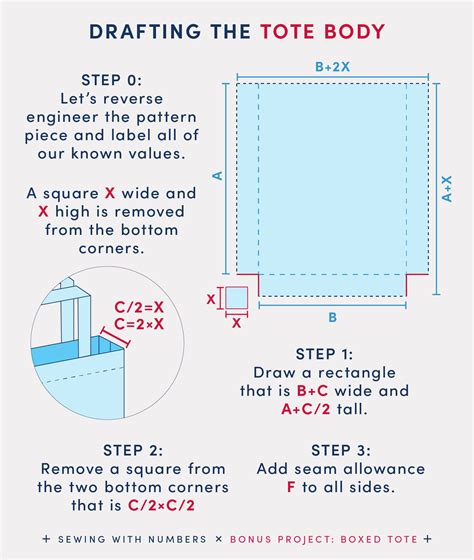
- Box the Corners:
- Turn the bag on its side so the corners are flat.
- Measure in 1 inch to 1 1/2 inches from the corner point.
- Stitch across this line to create a boxed corner.
- Cut off the excess fabric, being careful not to cut too close to the seam.
- Pro Tip: Backstitch at the beginning and end of this seam for extra security.
- Finish: Turn the bag right side out and push out the boxed corners. The corners don't need to be perfect, especially on your first try.
You've now completed your quick and easy boxy cosmetic bag! These are perfect for keeping your bathroom counter clutter-free and make wonderful gifts.
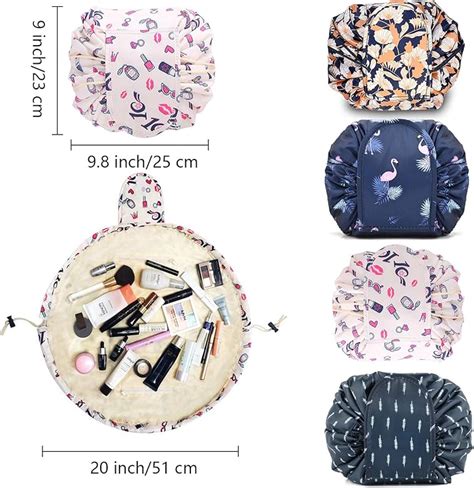
Drawstring Makeup Bag Tutorial
This tutorial guides you through sewing a drawstring makeup bag that doubles as a makeup mat, protecting your surfaces. It's an easy pattern, suitable for beginners, and requires no buttonholes or fasteners.
Features and Benefits:
This bag opens flat, acting as a protective mat for your makeup and brushes. When you're done, simply pull the drawstrings to enclose everything for on-the-go convenience. A Velcro flap covers the drawstring opening to prevent spills.
Materials and Pattern:
- Free pattern (available to newsletter subscribers or with a gallery access pass)
- Lightweight canvas for the outer fabric (avoid heavy fabrics that might bunch)
- Waterproof nylon or quilting cotton for the inner fabric
- Drawstring ribbons
Key Steps:
- Cut Pattern Pieces: Cut one circle from the outer fabric and one from the lining fabric according to the pattern. Transfer welt markings. Cut two buttonhole welts and two flap pieces from the outer fabric.
- Stitch Buttonholes: Align the welts with the markings on the outer fabric circle and stitch them in place. Clip into the corners of the welt stitching. Turn the welts through the cut holes to the wrong side and press. Reinforce by stitching around each welt opening.
- Stitch the Flap: Sew one side of the Velcro strip to a flap piece. Place two flap pieces right sides together and stitch around the edges, leaving a gap for turning. Clip corners and curves, turn right side out, and press.
- Attach Flap to Bag: Center the flap over the buttonholes on the outer fabric circle. Pin the bottom edge of the flap and the other side of the Velcro. Stitch the Velcro to the outer fabric and then sew a box around the bottom of the flap to secure it and close the gap.
- Sew Lining to Bag: Place the lining and outer fabric right sides together and stitch around the edges with a 1/4 inch seam allowance, leaving a gap for turning. Turn right side out and press the edges, tucking in the raw edges of the gap.
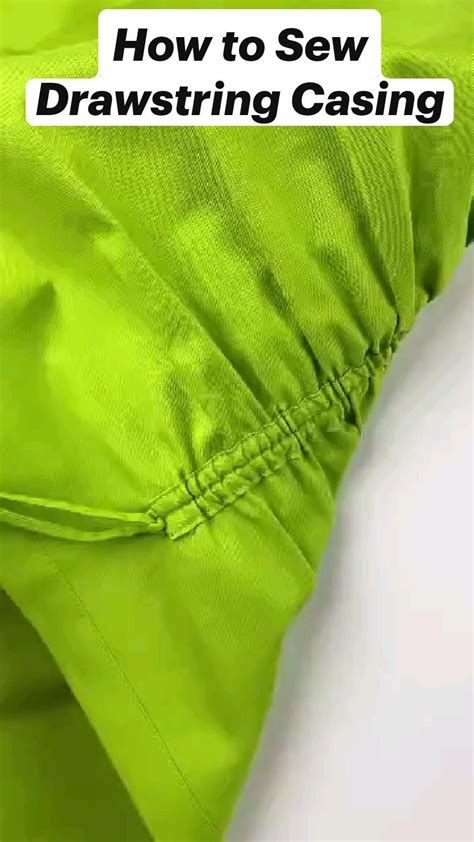
- Sew Casing: Topstitch around the edge of the circles to close the gap and form the top line of stitching. Sew another line just below the buttonhole welts to create the casing for the drawstrings.
- Thread Drawstrings: Use a bodkin or safety pin to thread one ribbon through a buttonhole, around the bag, and back out the same hole. Knot the ends. Repeat with the other ribbon and buttonhole.
You've now created a versatile drawstring makeup bag that's perfect for travel and everyday use.
DIY Zippered Pouch with Flat Bottom
This tutorial focuses on a zippered pouch with a flat bottom, allowing it to stand up on its own. This design makes it easier to access items and hold larger bottles and containers.
Design Features:
The flat bottom design provides stability and a larger perceived capacity. The pouch is ideal for makeup, toiletries, or other small essentials.
Materials and Cutting:
- Main fabric (e.g., houndstooth print)
- Lining fabric (e.g., canvas)
- Fusible interfacing
- Zipper (e.g., 9-inch zipper)
- Optional: Iron-on vinyl for a wipeable interior, or use laminated cotton.
Cutting Directions (Example):
| Fabric Type | Dimensions |
|---|---|
| Main exterior fabric | 2 pieces 4 1/2″ X 10″ |
| Exterior accent fabric | 1 piece 7″ X 11″ |
| Lining fabric | 1 piece 15″ X 11″, 1 piece 2″ X 3″, 1 piece 1 3/4″ X 3″ |
| Iron On Vinyl (if used) | 1 piece 6 1/2″ X 10 1/2″, 1 piece 14 1/2″ X 10 1/2″ |
| Fusible fleece | 2 pieces 6 1/2″ X 9 1/2″ |
Note: If using laminated cotton, cutting dimensions for accent and lining fabrics will differ. All seam allowances are 1/4″ unless otherwise noted.
Construction Steps:
- Prepare Exterior: If using iron-on vinyl, adhere it to the fabric pieces according to manufacturer instructions. If using laminated cotton, proceed to the next step. Line up and sew the accent fabric to the main exterior piece. Fuse fleece to the back of both exterior pieces. Topstitch along the seam between the primary and accent fabrics.
- Attach Zipper:
- Open the zipper halfway. Match the lining pieces right sides together and the main pieces right sides together.
- Finish the edges with a serger, zig-zag stitch, or binding.
- Align the zipper, right side down, with the top of the front exterior piece. Secure with pins, ensuring 1″ from the end of the pouch's exterior on one side.
- Place the lining right side down, aligning exterior, zipper, and lining. Sew along this edge, keeping the zipper out of the seam.
- Press both pieces away from the zipper. Attach the fabrics to the second side of the zipper similarly, ensuring the metal tabs line up. Press again.
- Create Zipper Tabs: Prepare zipper tabs by folding and pressing fabric pieces. Sew along the edges to create finished tabs.
- Assemble Pouch:
- Close the zipper about 1/4 of the way. Fold the lining of the front piece up and away. Pin the loose end of the zipper against the front piece.
- Fold down the back exterior piece and align edges, pinning seam allowances toward the lining.
- Sew around all four edges, leaving an opening in the bottom of the lining for turning.
- Box the Corners: Mark and cut 1″ squares from all four corners. Pull out the edges and line up the seams to create a straight line. Sew along this line with a 1/4″ seam allowance to box the corners.
- Finish: Turn the pouch right side out through the opening in the lining. Fold under the seam allowances of the opening and sew shut with an edge stitch. Push the lining inside and press the fabric away from the zipper. Topstitch around the top of the pouch. Trim the zipper end and attach a tab to cover it.
2 Ways to Sew Box Corners
Important Tip: When pressing the finished pouch, do not press the outside with both lining pieces touching, as the vinyl or laminated fabric can melt together. Press the front or back separately.