There’s something quietly powerful about creating a self-portrait when you let go of perfection and simply work with paper, texture, memory, and paint. This approach is not so much a technical lesson as it is an invitation to slow down, to notice, and to let your materials speak. Even if you never make a portrait beyond this one, the process reminds you that creativity does not have to be large or complicated.
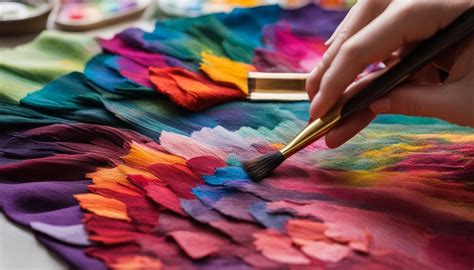
Creating a self-portrait in collage form is less about likeness and more about presence. You are not trying to “get it right”; instead, you are layering parts of your story. A scrap of an old letter, a piece of fabric that feels like home, a color that carries a season of your life - when you begin layering these pieces together, something shifts. The portrait becomes less about how you look and more about how you feel, about what you carry, and about what is ready to be seen. Collage is forgiving: if something doesn’t feel right, you respond by layering over it, softening it, or adjusting it. Nothing is wasted, and that mirrors how we live.
Getting Started with Mixed Media Collage Portraits
If you’d like to create along, here are a few simple reminders as you begin:
- Don’t overthink it: Start tearing or cutting without planning the whole piece. Let one material lead.
- Gather what you already have: Old book pages, wrapping paper, fabric scraps, dried leaves - you do not need special supplies to begin.
- Work in layers: Start with a base. Add texture. Add color. Pause. Respond. Let it build slowly.
- Use what works: A glue stick is perfect for paper. Gel medium works well for heavier items. Smooth things down gently and keep going.
- Let it be imperfect: Ripped edges, uneven lines, slightly off placements - these are part of the character of collage.
- Add something personal: A word, a symbol, a small piece of handwriting - let it carry meaning that only you fully understand.
- Embrace imperfection: It’s easy to get caught up in wanting everything to look ‘perfect,’ but collage, especially self-portrait collage, is about the journey. Imperfections make it unique and more authentically you. Those ripped edges and uneven lines? Embrace them!
- Finish with a personal touch: Once you’ve built up your layers, think about adding personal elements. This could be a word, a favourite symbol, or a little doodle. It’s those finishing touches that make the piece extra personal.
Most importantly, let this feel like time with yourself - not a performance, not a test. Have fun with it. This process should feel freeing, not rigid. If you’re kind to yourself and open to exploration, you’ll be amazed by what you create!
Materials and Techniques
The choice of materials significantly impacts the final piece. For instance, Amsterdam’s heavy body acrylic paints, formulated with high concentrations of authentic, non-fading pigments and 100% acrylic resin, offer exceptional durability and flexibility. These paints can be used to tone down areas, add contrast, or lighten a painting by painting white over an existing layer.
When it comes to adhering elements, a glue stick is suitable for paper, while gel medium is recommended for heavier items. For a strong, clear bond, Art Glitter Glue is a popular choice, capable of adhering various materials including paper, cardboard, metal, wood, canvas, plastic, and glass. It dries clear, making it ideal for delicate work where glue lines might be visible.
Exploring Texture with Collage
Mixed media collage offers a rich avenue for exploring texture. Elements like fabric tapes, which are repositionable and come in rolls, can add interesting patterns and depth. For example, black and white fabric tape can provide contrast, with the slightly transparent white backing allowing underlying colors to peek through.
Acetate filmstrips can add a strong graphical feel and create focal points for printed paper. When incorporating printed paper, consider its scale relative to your project surface. Tearing paper can create different edge effects; tearing towards yourself often results in a strong white edge, while tearing away from yourself yields almost no white edge. Adding a touch of shimmer, perhaps with Stoneground Paints applied to torn edges, can further enhance the visual appeal.
Feathers, collected from nature, can be easily added using glue, and finishing touches like splattering gold mica paint or incorporating words from washi tape can personalize the piece further.
Mixed Media Collage Portraits for Children
Mixed media collage is also an excellent way to explore portraiture and texture with children. Using cardboard as a base and recycled collage materials, young artists can create unique portraits. This project is particularly suitable for children aged 4 to 8.
Instructions for Children's Collage Portraits:
- Cut out cardboard shapes: Start with a cardboard base, such as a square, and attach a circle to it as a starting point. Painting the base with white acrylic paint can provide a good foundation.
- Gather materials with good texture: Think about the features you are trying to represent. For example, a cut-up straw and pom-pom can become a nose, buttons for eyes, yarn for a mouth, cut-up toothpicks for eyelashes, and lace for hair. Cardboard squares and rectangles can form the neck and shoulders. Provide a variety of interesting objects and let the children surprise you with their creativity.
- Create your portrait: Have children create their portraits using the materials and glue. Emphasize using a generous amount of glue for these textured materials. Press materials firmly into the glue for a few seconds to ensure they stick. Keep a damp towel handy for wiping sticky fingers.
- Add details and color: Drawing supplies can be offered last for finishing touches, allowing the focus to remain on the texture exploration.
- Let dry: Allow the collages to dry completely, preferably overnight.
- Secure loose pieces: Perform a "shake test" by gently shaking the piece. Secure any fallen-off pieces with extra glue or a hot glue gun if necessary.
These mixed media collage portraits are a great way for children to express their individuality, with each piece showing the personality of the young artist.
I Tried Every Mixed Media Technique!
Learning and Inspiration
For those interested in a more guided experience, workshops and courses are available. For example, a self-paced, pre-recorded mixed media workshop can guide participants step-by-step through creating layered, expressive portraits using personal photos. These workshops often cover simple photo transfer methods, blending collage and fabric seamlessly, softening edges with paint, building approachable skin tones, and integrating meaningful materials without overwhelming the face.
Online courses can offer comprehensive instruction, including learning basic flesh tones, adding collage elements to a portrait, personalizing the artwork, and telling a story through collage. Such courses are designed to be calm, doable, and allow participants to pause, rewind, and revisit content at their own pace. They emphasize that you do not need to be able to draw to begin; you only need a place to start and the willingness to explore.
Experimentation is key in mixed media. Artists can play with a variety of mediums, finding a balance that suits their vision. The imagination is the limit. Staying connected through newsletters can provide ongoing inspiration, creative prompts, and updates from the studio.