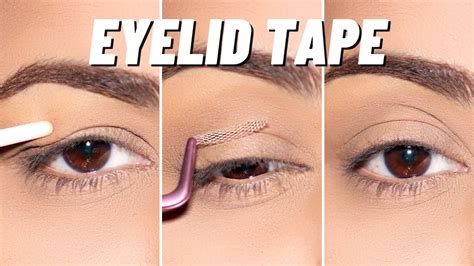
This tutorial is designed to guide individuals, particularly those with single eyelids, on how to effectively use eyelid tape to create the appearance of double eyelids. The aim is to provide a helpful and useful method for achieving a different look and exploring makeup variety. This technique can also be adapted for those with naturally double eyelids.
Understanding Eyelid Types
Before diving into the application, it's important to understand the difference between single and double eyelids:
- Single lids are characterized by eyelids that lack a visible crease above the lash line.
- Double lids have a distinct crease that runs parallel to the lash line.
What is Eyelid Tape?
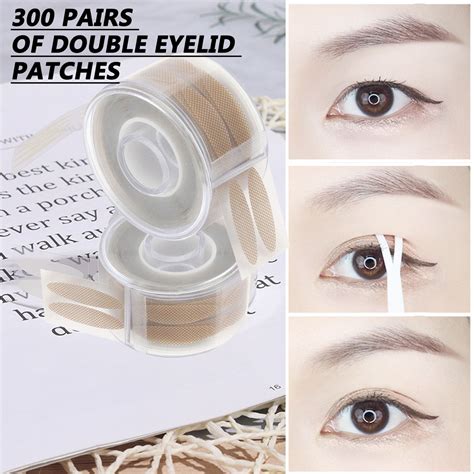
Eyelid tape is a specialized, small, and curved strip of medical-grade adhesive tape. Its primary function is to create a subtle crease on the eyelid, thereby achieving the look of double eyelids.
Application Steps
Step 1: Applying the Eyelid Tape
The first crucial step is the precise application of the eyelid tape. It is recommended to position the tape in a way that creates a natural-looking crease, considering your individual eye shape and size. This process may require several attempts to achieve symmetry and the desired effect, so patience is key. Do not be discouraged if the tape placement is not perfect on the first try.
For this tutorial, the "Eye Charm" (아이참) brand was used, though it is noted that it may not be a favorite brand, it effectively serves its purpose.
Step 2: Makeup Application
Once the tape is in place, the makeup application can begin:
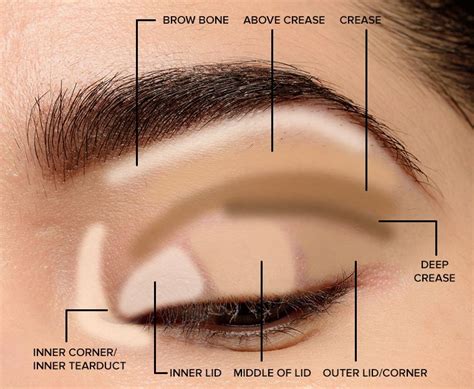
- Highlighting the Brow Bone: Apply a highlighter shade (referred to as color 1 in the Revlon palette) directly to the brow bone.
- Applying Lid Shades: Using a medium shade (color 3), apply eyeshadow to the eyelid, focusing on the area above and slightly to the outer side of the applied tape.
- Contouring the Lid: Introduce a darker shade (color 4) as a contour color to the lid. For a more defined and natural contour, use a smaller brush to carefully blend the shadow along the area just beneath the brow bone. This meticulous blending is essential for achieving a natural appearance.
Step 3: Eyeliner Application
This step requires precision and patience:
- Take a black, matte liquid eyeliner and draw a line that effectively covers the space directly beneath the eyelid tape. The line should also slightly overlap the bottom edge of the tape, extending from the inner corner to the outer corner of the eye.
- It is particularly important to ensure the tape is well-covered by the eyeliner on the inner half of the eyelid. This area is most visible when the eyes are open, and concealing the tape here is critical for a seamless look.
- To achieve a more dramatic effect, you can choose to cover more of the tape with eyeliner or opt to completely conceal the tape with black eyeshadow applied around its edges, creating a smokey-eye effect.
How & Why to use Lid Tape if you have HOODED Eyes
Step 4: Finishing Touches
Complete the look with the following steps:
- Gently curl your eyelashes using an eyelash curler.
- Apply a waterproof mascara, such as Max Factor Lash Perfection Waterproof mascara, to both the top and bottom lashes.
Following these steps will result in natural-looking double eyelids.