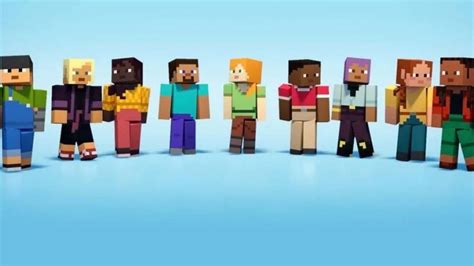
Ever wanted to stand out in the Minecraft world with a totally unique and eye-catching skin? Forget those flat, two-dimensional looks - let’s dive into the awesome world of creating 3D Minecraft skins! This guide will walk you through everything you need to know, from understanding the basics to using the right tools and techniques. Get ready to unleash your creativity and become the envy of the server!
Understanding 3D Skins in Minecraft
So, what exactly are 3D skins in Minecraft? Well, they’re not actually 3D in the way you might think of a 3D model in other software. Minecraft skins are still based on the same 2D texture files, but clever use of shading, layering, and extra pixel details gives the illusion of depth and dimension. Think of it like applying a really detailed paint job to your character.
This can include adding things like: protruding armor plates, detailed facial features, or even small accessories that seem to pop out from the skin.
Creating the Illusion of Depth
When you’re crafting your 3D skin, think about how light and shadow play across different surfaces. By strategically placing darker pixels to represent shadows and lighter pixels to mimic highlights, you can create the appearance of depth. For example, if you’re designing a character with a helmet, you could use darker shades around the edges of the helmet to make it look like it’s casting a shadow on the character’s face. Similarly, adding brighter pixels to the top of the helmet can give it a rounded, three-dimensional appearance. Don’t be afraid to experiment with different shading techniques to see what works best for your design.
The Power of Layering
Another important aspect of creating 3D skins is the use of layering. By carefully layering different parts of the skin on top of each other, you can create the illusion of overlapping objects. For instance, if you’re designing a character with a jacket, you could create separate layers for the jacket’s collar, lapels, and buttons. By placing these layers on top of the base skin, you can make the jacket look like it’s actually sitting on top of the character’s body.
Attention to Small Details
Finally, pay attention to the small details. Sometimes, it’s the little things that make the biggest difference. Adding small details like rivets, seams, and wrinkles can really bring your 3D skin to life. For example, if you’re designing a character with a leather jacket, you could add small stitches along the seams to make it look more realistic. Similarly, adding a few wrinkles to the character’s face can give them more character and personality.
Essential Tools for 3D Skin Creation
Alright, let’s talk about the tools you’ll need to bring your 3D skin ideas to life. You don’t need to be a tech wizard or have fancy software. There are plenty of accessible and user-friendly options out there.
Minecraft Skin Editors
These are your bread and butter. Skin editors allow you to directly edit the pixel-by-pixel texture of your Minecraft skin. Our Minecraft Skins Editor is the ultimate tool for creating and editing custom skins for your player and mobs in Minecraft. With its user-friendly interface and live preview feature, you'll have your skin looking just the way you want it in no time. The user interface is designed to be intuitive, making it easy for players of all skill levels to navigate and create custom skins. Even if you're new to skin editing, you'll be able to create custom skins in just a few minutes with our basic or advanced editors. The live preview feature is another great benefit of our skin editor for Minecraft. As you make changes to your Minecraft character, you'll be able to see them in real-time on a 3D model of the player or mob. This allows you to quickly make adjustments and ensure your skin is exactly how you want it before publishing it to the world.
Popular Skin Editors:
- Nova Skin: This is a web-based editor that’s super easy to use and packed with features. It’s great for beginners and pros alike.
- The Skindex: Another fantastic online resource with a massive library of user-created skins.
Image Editing Software (Optional)
While not strictly necessary, image editing software like Adobe Photoshop, GIMP (a free and open-source alternative), or Paint.NET can give you more control over the fine details of your 3D skin.
3D Modeling Software (Advanced)
If you’re feeling ambitious and want to create truly complex 3D effects, you could explore using 3D modeling software like Blender or Autodesk Maya. However, this is a more advanced technique that requires some experience with 3D modeling.
A Creative Mind
Don’t underestimate the power of your own imagination! The best 3D skins are those that are original and reflect your unique style. No matter which tools you choose, the most important thing is to have fun and experiment. Don’t be afraid to try new things and see what works best for you.
Step-by-Step Guide to Creating Your 3D Minecraft Skin
Okay, let’s get down to the nitty-gritty. Here’s a step-by-step guide to creating your very own 3D Minecraft skin.
1. Select a Base Skin
Start by selecting a base skin to work with. You can either create a skin from scratch or modify an existing one. If you’re new to skin creation, it’s often easier to start with an existing skin and then customize it to your liking. Nova Skin has a vast library of skins to choose from, so you’re sure to find something that catches your eye.
2. Plan Your Design
Before you start adding details, take some time to plan your design. What kind of 3D effects do you want to create? What colors and textures will you use? It’s helpful to sketch out your design on paper or create a digital mockup. This will give you a clear idea of what you want to achieve and help you stay focused during the creation process. Consider what kind of character you want to portray.
3. Apply Shading and Highlights
This is where the magic happens! Use shading to create the illusion of depth and dimension. Remember, darker pixels represent shadows, while lighter pixels represent highlights. Experiment with different shading techniques to see what works best for your design. For example, you can use gradient shading to create smooth transitions between light and dark areas, or you can use hard shading to create more defined edges.
4. Utilize Layering
Use layers to create the illusion of overlapping objects. For example, if you’re designing a character with a jacket, create separate layers for the jacket’s collar, lapels, and buttons. Then, place these layers on top of the base skin to make the jacket look like it’s actually sitting on top of the character’s body.
5. Add Finishing Touches
Now it’s time to add the finishing touches. Add small details like rivets, seams, and wrinkles to bring your 3D skin to life. You can also add accessories like hats, glasses, and weapons to give your character more personality.
6. Test Your Skin in Minecraft
Once you’re happy with your design, it’s time to test it out in Minecraft. Upload your skin to your Minecraft account and see how it looks in the game. Pay attention to how the skin looks from different angles and in different lighting conditions. If you’re not happy with something, go back to the skin editor and make the necessary adjustments.
Advanced Techniques and Tips for Next-Level Skins
Want to take your 3D skin game to the next level?
- Study Real-World Objects: Observe how light and shadow interact with real-world objects. This will give you a better understanding of how to create realistic shading on your 3D skin.
- Use a Limited Color Palette: Using too many colors can make your skin look cluttered and confusing. Stick to a limited color palette of 3-5 colors to create a more cohesive and visually appealing design.
- Pay Attention to Symmetry: While asymmetry can be used to create interesting effects, it’s generally a good idea to maintain some degree of symmetry in your 3D skin. This will make your skin look more balanced and visually appealing.
- Don’t Be Afraid to Experiment: The best way to learn is by doing. Don’t be afraid to experiment with different techniques and styles. Try new things and see what works best for you.
- Get Feedback from Others: Share your skin with other Minecraft players and ask for their feedback. They may see things that you missed and offer valuable suggestions for improvement.
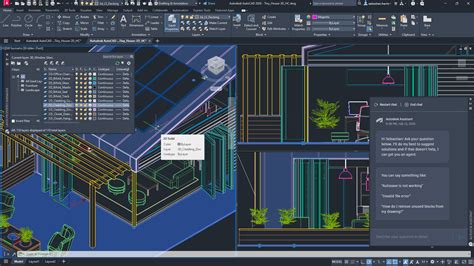
Exploring the MCSkinEdit3D Interface
For those using MCSkinEdit3D, understanding its tools is key to efficient skin creation. The application offers a blank tab with a color wheel at the bottom for new skin creation. To start, choose the miniature Steve at the top of the tab, located in the second mini-section of the controls.
Core Tools and Their Functions:
- Save: Saves the current skin.
- Save All: Saves all open skins.
- Upload: Uploads your skin to your account by left-clicking.
- Undo: Undoes your last action by left-clicking, or by highlighting all the things you want to undo.
- Redo: Redoes the last undone action.
- Camera: Puts you in camera position for viewing only. You can zoom by right-clicking or look around your avatar by left-clicking.
- Pencil: Allows you to draw in colors. The size of the pencil can be adjusted in the tab directly below the tools.
- Eraser: Erases anything you click.
- Dropper: Picks up a color by left-clicking on it. This color will be used when you switch to the pencil tool. Note: If you use the dropper on a helmet and there is nothing there, it will yield nothing. Disable the helmet first if you want to sample a color from the face.
- Dodge/Burn: Dodging simulates light shining on a part of the body, while burning simulates shadow. Be cautious, as excessive burning can make the character appear too dark.
- Darken/Lighten: Similar to Dodge/Burn, but it alters the color's lightness or darkness without necessarily simulating light or shade.
- Fill: Fills any connected area of the same color as where you left-clicked.
- Noise: Adds variations to the pixels in your selection, darkening and lightening them to create a textured effect.
- Stamp: Allows you to copy a section of a skin from MCSkinEdit3D and paste it elsewhere. Select a size, hold Shift, left-click to copy, and left-click again to paste.
- Perspective: Adjusts the viewing perspective.
- Texture: Places your character into the Minecraft default skin editing template.
- Hybrid: A mode for advanced editing.
- Reset Camera: Resets the camera to its default position.
- Screenshot: Captures a screenshot of your skin. Click the icon, hold Shift, then release.
Toggling Body Parts
You can toggle the visibility of different body parts for easier editing:
- Head (20): Select to toggle head visibility.
- Helmet (21): Select to toggle helmet visibility.
- Chest (22): Select to toggle chest visibility.
- Left Arm (23): Select to toggle left arm visibility.
- Right Arm (24): Select to toggle right arm visibility.
- Left Leg (25): Select to toggle left leg visibility.
- Right Leg (26): Select to toggle right leg visibility.
Tools in the Tab to the Far Left:
- Zoom Out: Shrinks the view.
- Zoom In: Magnifies the view.
- Import Here: Imports an image into the current project.
- New Skin: Creates a new, blank skin.
- New Folder: Creates a new folder for organization.
- Rename: Renames selected items.
- Delete: Deletes selected items.
- Clone: Select an item, then click the double Steve icon to copy and paste it into the same folder.
- Fetch from Minecraft: Allows you to type in a username to retrieve and edit their skin.
Alternative Application Modes
Within MCSkinEdit3D, you'll primarily use Creative Mode, which allows you to paint directly on 3D Minecraft models. However, there is another main application mode:
- Pose Model Mode: Allows you to pose the 3D Model by grabbing pivot points.
Publishing Your Skin
Once your skin is complete:
- Choose a model type (Steve / Alex) and a base model color.
- Choose a location to save the Minecraft skin .png file on your computer or mobile device.
- Click File > Publish on PMC! OR click the big "Publish on PMC!" button in the bottom right!
- Fill out the form with a title, category, and description.
- Click Save!
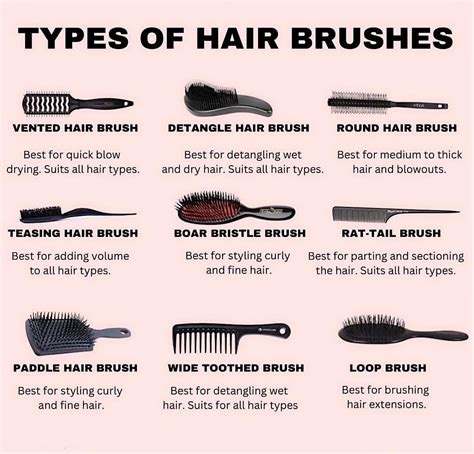
Advanced Brush Options
Brushes are fundamental for painting on the 3D model. Depending on the selected brush, you can modify its color, opacity, size, and mode. These options typically appear below the brush modes.
Different Brush Types and Modes:
- Smooth Mode: Paints solid pixels of color. You can adjust the color and opacity.
- Noise Mode: Paints pixels that automatically vary in intensity as you paint, creating texture.
- HSL Shift Mode: Paints pixels that shift Hue, Saturation, and Lightness.
- Clone Mode: Copies existing pixels and paints them to other parts of your skin.
Unique Magic Wand Options:
- Wand Select By: Changes how the wand selects pixels on your skin.
- Threshold: A lower threshold makes the selection pickier. Keep it low when trying to select a specific color.
Saving Custom Brushes:
At any time, if you are satisfied with the settings of a brush, you can click the add_circle icon in the brush list to save it as a custom brush for future use. For example, you can save a 5x5 red triangle brush rotated at 180 degrees. You can even import images to be used as custom brushes!
Brush Stroke Application Options:
These options change how your brush stroke applies to the skin:
- Constant: Paints pixels at a constant state, even when overlapping the current brush stroke.
- Builds Up: Paints pixels that build up color when you overlap your current brush stroke.
- Wrap Model: Brush strokes are allowed to move to other sides of the model.
- Surface Lock: Brush strokes that start on one surface will not wrap onto a neighboring surface.
Color Palettes
Color palettes provide quick access to a set of colors. A good color palette includes color ramps that feature a specific range of colors that work well together. To add colors, click the icon in the bottom left. If you have a color palette file, you can import the colors into the current color palette. You can even import images as palettes!
Managing Color Palettes:
- First, create a new custom palette.
- The size of the color palette colors can be increased or decreased using the and buttons in the lower left.
- The color palette pane is positionable: click the header and drag to reposition it.
- The color palette pane is resizable and can be toggled between compact and full-size views.
Troubleshooting Common Issues
Help! The layers are gone! Make sure your skin actually has elements on the second layer. If not, they won't be visible.
ZigZag patterns around corners will join up. This is expected behavior for seamless texture mapping.
With shaders, some body part layer sides have weird shadows. This can sometimes occur with shader implementations and specific resource packs.
Some modded armor is closer to the body than vanilla. You are probably using an ETF/EMF resourcepack that modifies armor rendering.
Credits and Permissions
Thanks to the awesome translators and contributors on Github! Feel free to use this mod in your Modrinth/Curseforge hosted modpacks without asking for permission.