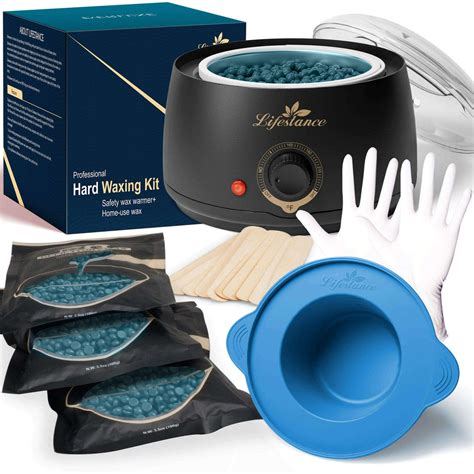
A perfectly done waxing service begins with a well-organized station. Your hard wax kit is your professional command center, a carefully chosen set of all the tools needed for a safe, quick, and comfortable hair removal experience. Unpacking the supplies in a new kit is the first step in creating a professional atmosphere. Maintaining a clean and organized setup is of utmost importance.

The industry is increasingly leaning towards the use of professional-grade kits. The global waxing kit market, valued at approximately $1.2 billion in 2023, is projected to reach $2.1 billion by 2032. North America represents a significant portion of this market, accounting for over 32%, with brands like Black Coral Wax trusted by thousands of estheticians for consistent, skin-friendly results.
Setting Up Your Professional Waxing Station
To ensure efficiency and professionalism, begin by selecting a flat, stable surface dedicated solely to your waxing service. A rolling utility cart is an essential tool for professionals, keeping everything organized and easily accessible. Your top priorities should be cleanliness and ease of access to your supplies.
Arrange your tools in the order you plan to use them to establish a natural and efficient workflow. A clean workspace is non-negotiable for an effective wax service. Ensure you have applicators of various sizes: large ones for areas like legs and back, and smaller ones for delicate areas such as eyebrows and the upper lip.
Understanding Your Hard Wax Kit Components
Get to know each item in your kit as you unpack it. The most crucial component is the wax warmer, which heats the wax evenly. Inside the warmer, the wax melts in a removable pot. Do not forget the essential pre- and post-wax solutions. The pre-wax cleanser is vital as it prepares the skin, preventing the wax from adhering too strongly to the skin itself, thus reducing irritation.
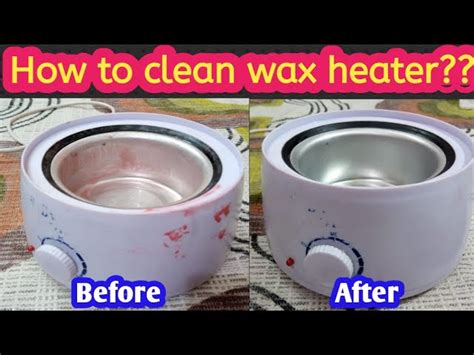
Finally, consider the longevity of your equipment. Maintaining your tools, especially the wax warmer, in good condition is a sound business practice. For detailed guidance on keeping your warmer in optimal condition, refer to dedicated cleaning guides.
Mastering Wax Temperature and Consistency
Applying wax is an art, and achieving the perfect texture before it touches the skin is paramount. Your hard wax warmer is your most valuable tool in controlling the temperature, which directly influences how the wax behaves. Formulas like those from Black Coral Wax are designed as low-temperature beads, meaning they melt at a lower heat setting. This significantly enhances client comfort and greatly reduces the risk of burns.
Think of your warmer's dial less as a direct heat control and more as a consistency regulator. Most professional warmers offer settings ranging from low to high, or a numbered dial. To begin, set the warmer to a medium-high temperature to melt the beads. Once the wax is fully liquid, reduce the temperature to a lower holding setting.
The goal is a consistency akin to thick, warm honey. If the wax is thin and watery, it is too hot. The perfect texture allows the wax to form a strong yet flexible strip upon application and removal.
Performing Temperature Checks
Before your first client, always perform a temperature check. Dip an applicator into the pot, scoop a small amount, and observe how it drips back in. Pay close attention to the flow. Then, apply a small test patch to the inside of your own wrist to gauge the heat. Learning to recognize the signs of incorrect temperatures is a critical skill for any professional.
Troubleshooting Wax Consistency Issues
Even seasoned professionals encounter consistency issues. Here’s how to address them:
- Wax is Too Stringy or Runny: This indicates your wax is overheated. Immediately turn down your warmer and allow it to cool for a few minutes. Stirring can help distribute heat and cool it faster.
- Wax is Too Thick and Drags: If the wax feels like spreading cold peanut butter and drags on the skin, it is too cool. Slightly increase the temperature and allow it a few minutes to warm up.
If the wax was applied too thinly or cooled too much before removal, it can become brittle on the skin. Ensure that the layer you apply is approximately the thickness of a nickel. This is where your skill truly shines.
The Benefits of Hard Wax for Sensitive Skin
When your wax reaches that perfect honey-like texture, it's time to focus on prep and application. Hard wax is highly effective because it is formulated to adhere to the hair, not the skin. This unique characteristic has made it a popular choice in the hair removal industry, as it lowers the risk of irritation by up to 50% in sensitive areas compared to traditional strip waxes. This skin-friendly approach contributed to its market success, especially as professionals adopt low-pain methods for sensitive services.
Proper Skin Preparation and Application Techniques
Proper skin preparation is non-negotiable for optimal results and client comfort. Begin by cleansing the area with a professional pre-wax cleanser. This removes surface oils, sweat, or lotions that could interfere with wax adhesion. For extra-sensitive areas like the bikini line, underarms, or face, a pre-wax oil is an invaluable asset. Apply a very thin layer-just enough to create a slight sheen without making the skin slippery.
Applying Hard Wax
Applying wax is a fluid motion that requires both confidence and control:
- Swirl: As you remove the applicator from the pot, swirl it against the edge.
- Spread: Apply the wax with firm, even pressure, always moving in the direction of hair growth. Aim for a strip that is approximately the thickness of a nickel. If it is too thin, it may crack and break upon removal.
- Create a Lip: The single most important part of the application is creating a clean "lip" or "tab" at the end of the strip. This provides a point of contact for removal.
Knowing precisely when to remove the strip is a skill that develops with practice. To check, lightly tap the strip. With one hand, hold the skin tight, and with the other, grab the lip and pull. The motion should be quick and parallel to the skin, moving against the direction of hair growth. A quick, straight pull makes the process less painful and prevents hair breakage.
Introduction to Waxing - Beginners Hard Wax Tutorial
Post-Wax Care for Sensitive Skin
The waxing service doesn't end when the last strip is pulled off. Post-wax care has two crucial parts: immediate soothing and ongoing maintenance. Both are necessary to calm the skin, reduce redness, and prevent common issues like bumps and ingrown hairs.
Immediate Soothing
The skin is most sensitive immediately after waxing. Hair follicles are open, and the area may feel warm or appear red. The first step is to remove any sticky wax residue. A good post-wax oil, such as ili Oil, is designed for this purpose. Apply it with soft, sweeping motions. Avoid rubbing too hard, as this can aggravate sensitive skin.
For clients with extra-sensitive skin or after an intensive service like a Brazilian, a cool compress can provide significant relief.
Ongoing Aftercare
The 24-48 hours following a wax are critical, as the skin remains vulnerable. Effective aftercare also supports your skin's overall health. Once the initial sensitivity subsides, the focus shifts to maintaining results and, most importantly, preventing ingrown hairs, which are a significant concern for both professionals and clients.
- Avoid Irritants: For the first 24-48 hours, avoid hot baths, saunas, swimming pools, and intense workouts.
- Wear Loose Clothing: Tight, synthetic fabrics can trap heat and moisture.
- Exfoliate Gently: Begin gentle exfoliation about 2-3 days after waxing. This is the single most effective way to prevent ingrown hairs.
- Moisturize Daily: Hydrated skin is healthy skin.
Maintaining Your Hard Wax Kit
Aftercare extends to your tools as well. A clean hard wax kit is the foundation of a hygienic, professional service. To clean your wax pot, turn it on a low setting just long enough to soften any leftover wax residue. Never use water to clean your pot, as it will not dissolve wax and can damage the warmer’s electrical components.
Choosing the Right Wax Formula
Not all hard wax is created equal. Experienced professionals know that using the correct formula distinguishes a good service from a great one. Different body areas, hair types, and skin sensitivities require a tailored approach. This is not merely a matter of preference; it is a smart business strategy.
The hair removal wax market was valued at US$ 10.19 billion in 2023 and is projected to reach US$ 18.4 billion by 2033. A significant driver of this growth is the professional demand for superior products, such as flexible, low-temperature hard waxes that melt around 50°C. These formulas can reduce redness by up to 40% and provide a gentler removal experience.
Specialized Wax Formulas
Consider your different wax beads as specialized tools, each with unique properties:
- For Delicate Facial Waxing: The face requires a specialized approach. Areas like the brows, upper lip, and sideburns have fine hair and extra-sensitive skin. The Plumeria formula is ideal for facial services due to its gentle, creamy texture and flexibility.
- For Coarse, Stubborn Hair: Underarms and bikini lines present a different challenge with thicker, more deeply rooted hair. The Kai formula is engineered with maximum grip for these challenging areas.
- For Large Body Areas: When performing a full leg, arm, or back wax, efficiency is key. The Mae Mae formula strikes a balance between gentleness and strong grip, making it suitable for most body areas.
By selecting the right wax for the job, you are tailoring the service to the client’s specific needs. Mastering this selection process is a hallmark of professionalism.
Troubleshooting Common Waxing Issues
Even with a solid understanding of the basics, practical questions often arise when using a new hard wax kit. Refining your technique and troubleshooting challenging situations are integral parts of the craft. Using a hard wax kit effectively is a skill that improves with time and practice.
Application Problems
A common frustration is a wax strip breaking or feeling weak during removal. This often stems from the wax not being applied thickly enough or being too cool. If the wax is too sticky, stringy, or doesn't come off in one piece, it likely means it was too hot or left on the skin for too long, leading to a mess and potential irritation.
Knowing how to avoid these problems is a game-changer. A perfectly heated wax should have the consistency of thick, warm honey. A quick-reference guide can be invaluable for diagnosing a problem mid-service:
- Wax is too cool or brittle: Increase the heat slightly on your warmer. Apply a slightly thicker layer of wax.
- Wax is too hot or stringy: Turn the warmer temperature down. Allow the wax to cool for a moment before applying.
- Wax is difficult to remove or breaks: Ensure the skin is clean and dry using a pre-wax cleanser. Always hold the skin taut during removal. Avoid going over the same area more than once.
Professional vs. At-Home Hard Wax Kits
Finding the right hard wax kit isn't about a one-size-fits-all solution; it's about selecting tools for your specific needs. The best kit for a licensed esthetician seeing clients back-to-back will differ from what someone doing their own nails at home requires.
For Salon Professionals
For licensed estheticians, tools need to perform consistently and reliably throughout the day. Key features include:
- High-Capacity Warmer: Look for warmers that can hold at least 1 kg (2.2 lbs) of wax beads to reduce refill frequency.
- Bulk Wax Options: Professional kits often offer wax in larger quantities.
- Variety of Formulas: A professional works with diverse clients, so a kit should accommodate or include multiple wax types for different skin and hair needs.
For At-Home Use
If you primarily use your wax kit at home, your priorities will be ease of use, smaller quantities, and clear instructions.
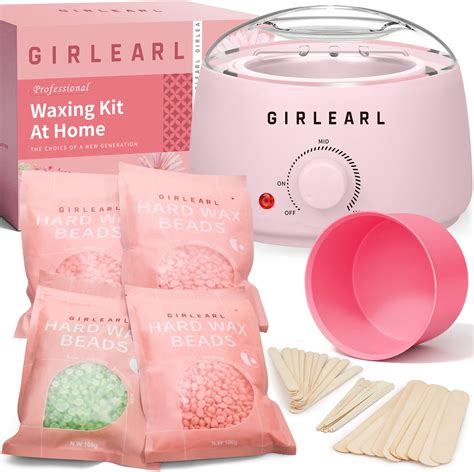
- Easy-to-Use Starter Kits: These typically include a smaller warmer (around 500g), a manageable amount of wax beads, applicators, and clear pre- and post-care instructions.
- Comprehensive Instructions: A good kit for home use should come with clear, step-by-step directions.
- Specific Formulas: If you are waxing your face or underarms, choose a kit that includes wax formulated for sensitive skin.
Ultimately, selecting a reliable brand like Black Coral Wax ensures that even a starter kit contains components of professional quality.
Step-by-Step Guide to Using a Hard Wax Kit
This guide details each step, from preparation to aftercare.
1. Prepare Your Workspace and Skin
A professional service requires a clean and organized workspace. Place your wax warmer on a flat, stable surface. Arrange your applicators, cleanser, and post-wax oil within easy reach. Next, prepare the skin by using a pre-wax cleanser to remove any oils, lotions, or sweat.
2. Heat and Prepare the Wax
Turn on your warmer and pour in the hard wax beads. You can start with a medium-high temperature to melt them, but be sure to reduce it to a lower holding temperature once the wax is liquid. The correct consistency is paramount.
3. Perform a Temperature Test
If the wax drips quickly from the applicator, it is too hot and can burn the skin. Before proceeding, always perform a patch test. First, test a small amount on the inside of your wrist to check the temperature. Then, use a new applicator to scoop a generous amount of wax.
4. Apply the Wax
Apply the wax with steady, even pressure in the same direction that your hair grows. The strip should be about the same thickness as a nickel-thick enough to form a strong, solid strip, but not so thick that you waste product. Leave a slightly thicker, rounded edge at the end of the strip as you spread it.
5. Remove the Wax Strip
Allow the wax to harden for about 30 to 60 seconds. When it is no longer sticky but still feels flexible, it is ready to be removed. If you pull too soon, you will end up with a soft, stringy mess.
- Hold the Skin Tight: Pull the skin tight just below where you intend to remove the strip with your free hand.
- Pull Quickly and Parallel: With one quick, sure motion, pull the strip off in the opposite direction of hair growth. Keep your hand close to and parallel to the skin, similar to removing a bandage.
- Apply Pressure: Immediately after removing the strip, apply firm pressure to the waxed area with your hand for a few seconds.
6. Post-Wax Care
Once you have finished waxing the entire area, use a good post-wax oil. This is an important step for a professional finish. Introducing your post-wax chill pill: cool, soothe, and soften freshly waxed skin with a lightweight mango aloe gel. Always opt for a light emollient lotion or oil on your skin after waxing.
After waxing, the skin will be more sensitive to the sun. Therefore, avoid direct sun rays for a minimum of 24 hours.
Soft Wax vs. Hard Wax: Understanding the Differences
Waxing is a popular hair removal method offering smooth, long-lasting results. The two main types encountered are soft wax and hard wax, each with unique benefits.
Soft Wax (Strip Wax)
Soft wax, also known as strip wax, is ideal for large areas like the legs, arms, and back. It's applied in a thin layer and removed with cloth or paper strips. However, soft wax can be more irritating to sensitive skin because it adheres to both hair and skin, potentially causing more tension during removal.
Hard Wax (Peel-able Wax)
Hard wax is typically used for smaller, more sensitive areas such as the face, underarms, and bikini line. It's applied in a thick layer and hardens as it cools, allowing it to be removed without strips. Hard wax is generally considered less painful as it adheres primarily to the hair, reducing the chances of skin irritation or damage.
Key Differences Summarized:
- Application Area: Soft wax for large areas; hard wax for smaller, sensitive areas.
- Pain Level: Hard wax is generally less painful due to its adherence to hair only.
- Skin Adherence: Soft wax adheres to both hair and skin; hard wax adheres mainly to hair.
Which Wax is Best?
- For larger areas and fine hair: Soft wax is a quick and effective option.
- For smaller, sensitive areas and coarser hair: Hard wax is the preferred choice.
Duration and Reusability
- Duration: Both soft and hard wax can provide long-lasting results, typically 3-6 weeks, depending on individual hair growth cycles.
- Reusability: Hard wax should not be reused after application.
Specific Use Cases
- Brazilian Wax: Hard wax is generally preferred for its gentler application in sensitive areas.
- Facial Waxing: While soft wax can be used, hard wax is often recommended for sensitive facial skin and delicate areas like eyebrows.
Both soft and hard wax have their advantages, and the right choice depends on your specific waxing needs. If you’re ready to perfect your waxing technique, consider exploring training courses for in-depth tutorials.
At-Home Waxing: Convenience and Control
For many, the goal is achieving perfect, hair-free skin without costly salon appointments. At-home waxing provides a practical and reasonably priced approach to maintaining smooth skin, making it increasingly popular. Using an at-home wax kit offers the benefit of controlling the entire process.
Choosing an At-Home Kit
Select an at-home wax kit based on the type of wax it contains. The best wax for hair removal depends on your preferences, hair and skin type, and desired outcome. While strip wax (soft wax) is common, hard wax is also a popular choice for its gentler application.
Cruelty-Free and Vegan Options
Cruelty-free products are highly appreciated, and vegan wax is often advised for hair removal projects.
Getting Professional Results at Home
Although using an at-home wax kit may seem difficult initially, with the correct preparation and skill, you can achieve smooth, professional-grade results. Getting professional-level performance at home requires attention to detail and practice. Waxing kits are not all made equal; search for kits with premium wax, simple applicators, and clear directions.
Key Considerations for Waxing Success
Maintaining consistency in your waxing schedule can help slow down hair growth over time and ease the process's discomfort. Avoid waxing the same area multiple times in one session, as this can irritate and harm the skin.
While at-home waxing is convenient, there are times when seeing a professional may still be advisable. However, a good approach to achieving professional-level hair removal in the comfort of your own home is with a well-chosen at-home wax kit. Brands like Black Coral Wax offer professional-grade products suitable for both home and salon use.